

Whether you choose a default automation template or create a custom automation, each workflow follows a series of conditions and triggers before an action is performed. Once the required criteria are met, the automation carries out the selected action such as sending a message to your guest.
The WelcomeScreen automation setup follows these five steps:
Let’s explore each step and see how you can set up and manage your guest communication automation with WelcomeScreen.
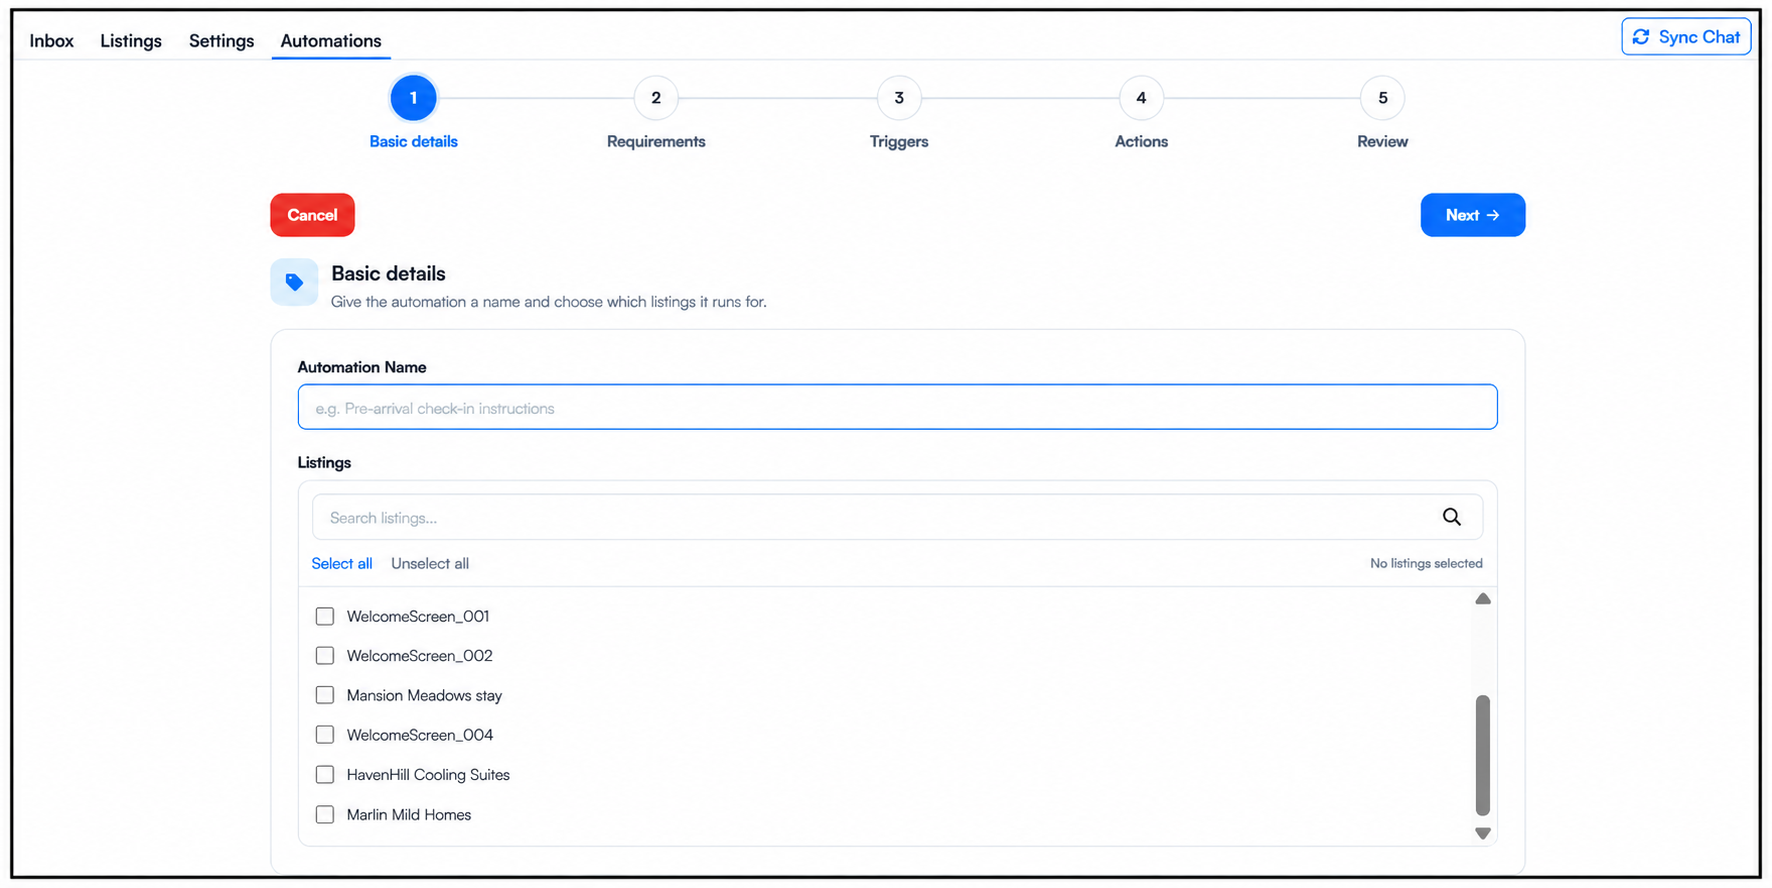
The first step is to set up the foundation of your automation. Enter a clear Automation Name to identify the workflow, then choose the listings where you want it to run.
All properties imported into WelcomeScreen will be available in the listings section. You can select specific listings or apply the automation to multiple properties, depending on where you want the workflow to be active.
Once the name and listings are selected, you can move on to the next step.
Now that you've configured the basic details, the next step is to set your Requirements. Learn more about setting Requirements
For additional assistance or questions, contact the WelcomeScreen support team at: support@welcomscreen.com


.png)